Audio Effects For Beginners
Stickleback Music
- Damian Evans
Date
- 22.01.22
Introduction to Audio Effects
If the music, you’ve composed, was a Christmas tree, audio effects would be the decorations and tinsel, adding definition, depth, colour and, further, interest! Composers are inspired to work with melody, harmony and rhythm. Whether for live performance, recording or mixing, producers, and sound engineers, are inspired to work with ‘Audio Effects’ in order to create the best, and most appropriate sound, for the music.
Many traditional forms of music require very little, if any, audio effects in their mixdown. A simple, clean recording of the performance with the room ambience (natural reverb), will suffice, for example, folk and classical music require very little tampering with, just good mic placement (but that’s a different article!). However, the art of producing music in a particular genre; drum and bass, rock, ambient techno, fusion, etc, is the art of using ‘Audio Effects’ well.
As we progress in detail, in subsequent articles on the subject, you will realise that whether you’re a beginner or a seasoned pro, there will always be something to learn about the use of ‘Audio Effects’ in your mix.
And finally, Effects come in three physical forms; pedals, effects units and plugins. I have chosen to use plugins to illustrate these articles simply because I feel they are visually more intuitive.
(I will be using the set of ‘Soundtoys‘ plugins to illustrate this article, not because they are effects I use all the time in my own work, which, in fact, they are, but because their GUI (graphic user interface) is so funky!)
This article sets out to introduce you to the core effects used in today’s studios:
- Spectral effects—EQ and Panning
- Time-based effects—Reverb, Delay and Echo
- Modulation effects—Chorus, Tremolo, Flanger and Phaser
- Dynamic effects—Compression and Distortion
- Filters
1. Equalisation (EQ)

Equalization (or EQ) is the cutting or boosting of a particular frequency (or range of frequencies) in the frequency spectrum.
Whoa! Lost already? So, we are dealing with the ‘Physics of Sound’, right off the bat – and why not!
In physical terms, sound is made up of waves of energy. The faster the wave (its frequency), the higher its pitch – for example, high and low notes on a piano or guitar string. A composition, however basic, will consist of notes of varying pitches, some low frequency (for example, bass), some medium frequency (for example, rhythm guitar) and some high frequency (for example, female vocals).
A simple EQ device for boosting or cutting the frequency of sound is the Volume pot, on an audio device, or fader on a mixing desk. This could be described as a single band EQ. It cuts all frequencies to make ‘everything’ quieter or boosts ‘everything’ to make it louder.
A simple, two band, EQ separates the frequencies into ‘Bass’ and ‘Treble’. You have control over those two frequency ranges.
A five band EQ splits the frequency into five ranges, a ten band, ten, and so on…
The more bands you have, the more control over the frequency volume at any point across its range or ‘spectrum’.
At its most basic, EQ gives you the ability to sculped the overall volume of each part of you mix, each band of the ‘audible frequency spectrum’.
You want more bass? Boost the volume of that particular frequency. Want the vocals to stand out, find its frequency and boost it. Guitarist too loud, again, cut that frequency, and so on.
Click here for more detail – ‘EQ – Intermediate’.
Click here for Kit – VST Plugins
2 Panning

Panning is the distribution of a sound signal within a stereo (or multi-channel) field.
So, for example, in your studio you will have two speakers, one on the left and one on the right. If you turn the volume off for the right speaker, sending the signal just to the left, the sound waves traveling from the speaker (sound source) on the left, will reach your left ear a fraction of a second before the right ear. Your brain is able to perceive this sound and place it within the stereo (left and right) field, and you hear the sound as coming from the left hand side. This would be a basic panning effect – you have panned the signal to the left.
Panning works by letting through more or less of a signal into each speaker, creating various spatial effects.
Your brain is amazing at placing a sound source within a stereo field. Close your eyes, listen and point to where you think a sound is coming from. Stereo speakers can artificially create the same effect. For surround sound, a 3D spatial field, you would need a multi-channel (multi speaker, for example 5.1) set up.
You can apply panning, at its simplest a left and right knob, to individual tracks (instruments or effects) within your mix. For example, you can pan the lead guitarist to the left, the keyboard to the right and the vocalist to the middle (coming out of both speakers with equal volume). This creates the illusion of instrument placement on the sound stage within the stereo field.
If you modulate (change) the panning in real time during a mix (this can be fully automated) it gives the impression of the sound source moving from one position on the stage to another.
The panning audio effect is really useful for instrument placement, creating special effects, and for avoiding muddiness or masking (when two tracks/sounds overlap) in your mix. You can position each sound to a specific area of your stereo field to create clarity.
Click here for more detail – ‘Panning – Intermediate’.
Click here for Gear Up – VST Plugins
3 Reverb

In the introduction I wrote, ‘A simple, clean recording of the performance with the room ambience (natural reverb), will suffice’. But what is this ‘natural reverb’?
Let’s say you are standing close to a sound source, a speaker or instrument, for example. The sound waves, travelling in all directions, reach you first and then go out into the space around you. If these waves hit an object, a wall for example, some of the wave, with less energy (therefore quieter), bounces back to you. This is reverberated sound which, because sound is travelling so fast, you hear almost at the same time. This effect is called reverb.
Reverb effects can emulate the reverberation from all sorts of locations, the most obvious being ‘Room Reverb’, but other types of spaces include; soundstage, halls, churches, cathedrals, caves, and anything else you can imagine.
Reverb can be used to emulate an instruments location or create otherworldly, ethereal atmospheres.
Click here for more detail – ‘Reverb – Intermediate’.
Click here for Gear Up – VST Plugins
4 Delay and Echo
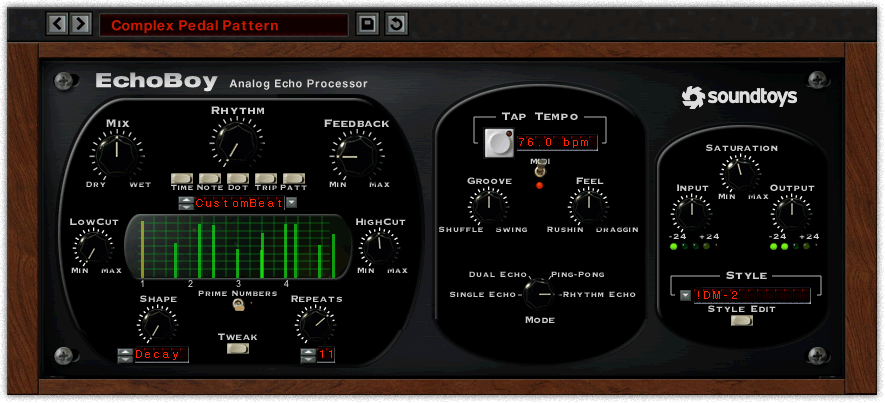
Also falling under the Time-Based category, ‘Delay and Echo’ are very similar effects to reverb. In nature, the reverberated sound has simply travelled far enough to make each passing sound wave perceived as a separate event.
So, for example, Let’s say that you are the sound source and you shout ‘HELLO!’. Let’s place the single, ‘sound wave reflecting’ wall a bit further away. The sound leaves you and travels towards the wall. It takes a bit longer to bounce back to you and is therefore perceived, distinctively, as a second event (unlike reverb where reverberation is perceived as a single event). That is ‘Delay’.
Now, let’s replace the wall with a mountain, far off in the distance. The time it takes for the reverberated ‘HELLO!’ To get back to you is that much longer. It has become an ‘Echo’.
A Delay effect simply repeats an audio signal for playback at a set period of time after the original signal.
It turns out that the Delay effect is used as the foundation for many other effects, including; chorus, reverb and echo. It all depends on the period of time between repetitions, the number of repetitions and the decay of the signal (does each subsequent signal have less energy.? has it the same energy? Does it increase?).
The possibilities are endless!
Click here for more detail – ‘Delay and Echo – Intermediate’.
Click here for Gear Up – VST Plugins
5 Chorus

Chorus is part of the modulation category of effects (see ‘Chorus – Intermediate’ below). It is very similar to Delay, in that it makes a copy of a sound and repeats it at a set period of time after the original sound source. However, unlike delay, the pitch of the repeated sound is also modulated (changed) – higher or lower or in flux.
Each copy, of the original sound, can be timed and tuned slightly off each other and layered similar to how a solo singer sounds compared to having a choir. Used, in a subtle way, it creates a fuller, thicker sound and adds harmonic content to your original sound, ‘beefing-it up’.
A stereo chorus does the same, but with added panning in the delays creating a fuller, more interesting sound, across the stereo field.
Click here for more detail – ‘Chorus – Intermediate’.
Click here for Gear Up – VST Plugins
6 Tremolo

A Tremolo is a modulation effect that varies the amplitude (volume) of a signal. It can be used to create an emotive, trembling effect – the word ‘tremolo’ is in fact Italian for ‘trembling’. A violinist achieves tremolo, naturally, by bowing quickly, back and forth across the strings. The motion causes a repetitive, modulating amplitude.
The tremolo arm, on some fender guitars, is actually a misnomer because using the arm modulates the pitch of the sound, not its amplitude. It should be called a ‘Vibrato’ arm.
tremolo effects are obtained with an LFO modulating the amplitude up and down at varying speeds
Click here for more detail – ‘Tremolo – Intermediate’.
Click here for Gear Up – VST Plugins
7 Flanger and Phaser

Flangers and Phasers are modulated effects, very similar to chorus. To fully understand how they work requires a level of Physics, again!, that we will introduce in a more detailed article (see below – ‘Flanger and Phaser – Intermediate’) Basically, they both utilize and modulate copies of the original sound source but the delay times, involved, are much shorter. Flangers use much shorter delay times (1ms to 5ms) compared to choruses (5ms to 30ms) and only involve one copy of the original signal while choruses can create multiple copies.
Flanging is a popular effect that sounds like sweeping or “whooshing” across the higher frequencies. It can be used to add subtle depth, to a sound source, or create an otherworldly experience.
Phasers effects have a sound that falls somewhere between a phaser and a chorus in intensity, but they differ from choruses and flangers in one key aspect: phasers don’t modulate the delay time. Subtle stuff!
Click here for more detail – ‘Flanger and Phaser – Intermediate’.
Click here for Gear Up – VST Plugins
8 Compression

Compression is an effect that reduces the dynamic range of a sound source—the difference between the loudest and quietest parts of an audio signal. When compression is applied, it can be used to boost the quieter parts of the signal and attenuate (decrease the volume) of the louder ones.
As an example, you have recorded a vocal track where the dynamics change from subtle emotion to forceful regret, however, when played back with the other tracks, the emotional content gets lost – it’s too quiet compared to the guitarist (the guitarist, again!) and other instruments. Compression can reduce the dynamic range of this vocal track, raising the volume of those emotional lyrics, and thus enabling the listener to hear all the vocals clearly.
Back to physics again! Compression can become as complicated as you want to take it. You could do a masters in this stuff and this post has merely scratched the surface.
Click here for more detail – ‘Compression – Intermediate’.
Click here for Gear Up – VST Plugins
9 Distortion
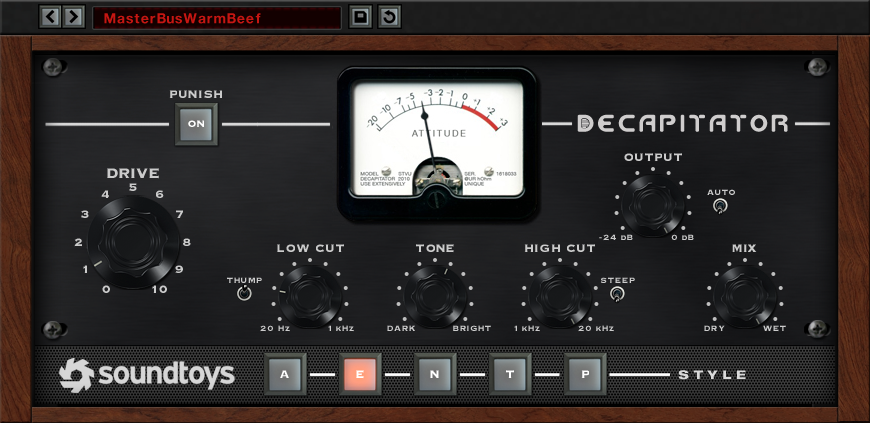
In most studio situations, Distortion, the overloading of an audio circuit causing a signal to clip, should be avoided at all costs, especially in a digital studio – it never sounds good. However, as guitarists have found out, turning their gain pot to 11, in the right situation, distortion can be a powerful tool in your audio effects arsenal.
The distortion effect changes your original signal by pushing the sound to clip and compress. This adds harmonic content and colours the sound.
Originally used by guitarists, to add aggressive punch, it is now also used on synths and VST Plugins to make them sound fatter and fuller. It adds complexity and body to your sound.
Click here for more detail – ‘Distortion – Intermediate’.
Click here for Gear Up – VST Plugins
10 Filters
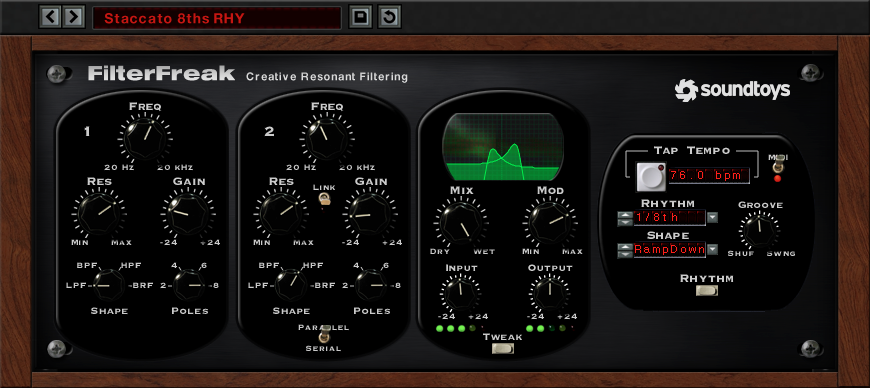
An audio signal’s frequency range (have a look at EQ above) can be altered using Audio Filters. An audio filter can attenuate (turn down) or boost a set of frequencies above or below a determined threshold—called the ‘cutoff frequency.’ They’re often found inside of EQs or as stand-alone plugins.
Audio Filters fall under 3 types; HPF (High-pass filters), LPF (Low-pass filters), BPF (Band-pass filters).
Filters can be very subtle or very dramatic. They colour your sound—making it darker (with a LPF) or brighter (with a HPF). The BPF can be used to create special effects and a ‘Filter Sweep’ is an effect used prolifically on most techno and dance genres.
Click here for more detail – ‘Filters – Intermediate’.
Click here for Gear Up – VST Plugins
Conclusion
This article has introduced you to the core types of audio effects found in most studios. You should now feel more confident and be able to start to effectively use them as part of your work flow.
Our ‘Audio Effects For Intermediate’ posts, will go into more detail and introduce you to some of the parameters, used on each effect, with audio examples of what each effect actually sounds like.

Damian Evans
Composer / Producer / Director / Blogger
Posts
Subscribe to our fortnightly newsletter for Tutorials, Compositions Tips, Kit and more .
